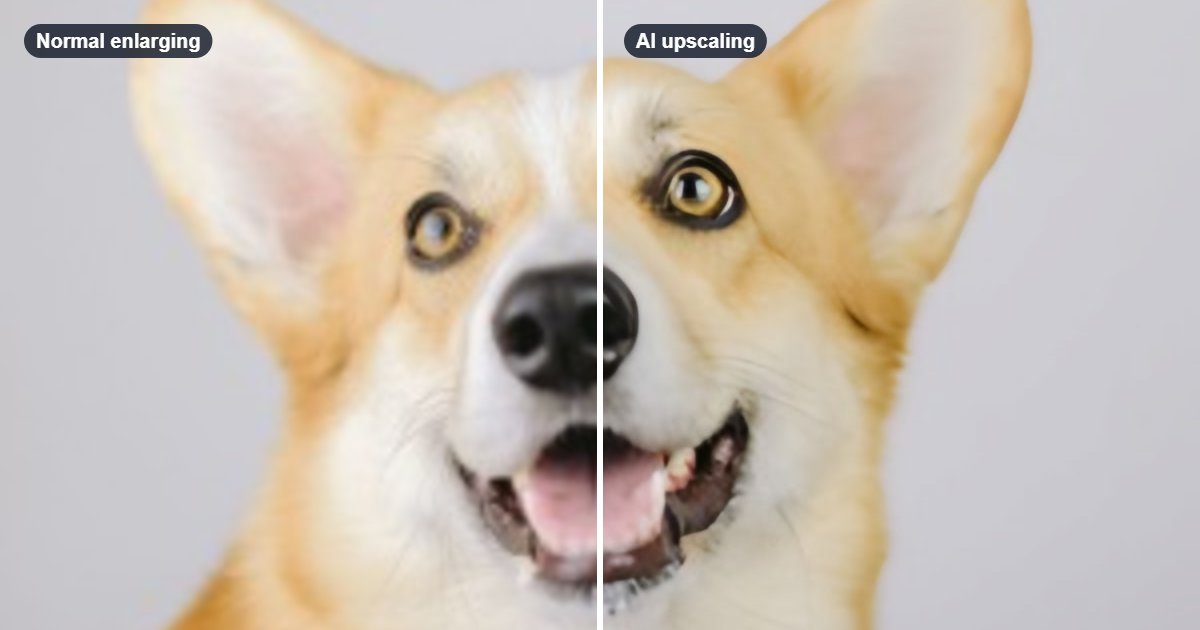
You have a photo or logo that's too small: for a print, a banner, or an upload form that asks for at least 1000 pixels. When you simply make it bigger, it turns soft and blocky.
This guide shows how to enlarge it with AI instead, using the image upscaler on this site. It runs in your browser, so your images are never uploaded. It's free, with no sign-up and no watermark.
The 30-second answer
- Open the image upscaler and add your image (JPG, PNG, WebP or GIF, up to 20 at once).
- Under Enlarge, choose 2× or 4×.
- Under Look, keep Natural for photos, or choose Sharp for logos and graphics.
- Click Upscale image, compare before and after with the slider, and download.
Normal enlarging versus AI enlarging
Normal enlarging, the kind every image editor does, can only stretch the pixels you already have. It fills the gaps by blending neighbouring pixels, so edges get soft and small details turn into blur.
An AI upscaler has learned what real photos look like. Instead of stretching, it redraws edges and textures at the new size. Small product photos, logos and old pictures usually come out noticeably cleaner.
This tool uses Real-ESRGAN, a well-known open-source upscaling model. The model is about 5 MB. Your browser downloads it once and then keeps it.
What it can't do
AI upscaling is not magic, and it's worth knowing the limits before you start:
- It can't recover detail that was never captured. A blurry face stays a face that was blurry, only bigger and smoother.
- Text that's too small to read won't become readable. The AI sharpens the shapes it sees; it doesn't know what the letters should say.
- The result is only as good as the original. Start from the sharpest, largest version you have. A screenshot of a photo, or a photo sent through a messaging app, has already lost detail.
2× or 4×?
- 2× doubles the width and height, so the image has four times as many pixels. It suits most photos and is quicker.
- 4× makes the width and height four times larger. It's best for very small images: icons, thumbnails, or a logo you only have in a small size.
There are size limits, so the result stays within what browsers can handle and the wait stays reasonable: up to 4 megapixels for 2× (for example 2000 × 2000 pixels) and up to 1 megapixel for 4× (for example 1000 × 1000 pixels). If your image is too large for 4×, the tool says so and suggests 2× instead.
Natural or Sharp?
When we tested the AI on its own with portraits, it looked over-processed: skin turned plastic-smooth and beards got artificial-looking strokes. So there are two looks:
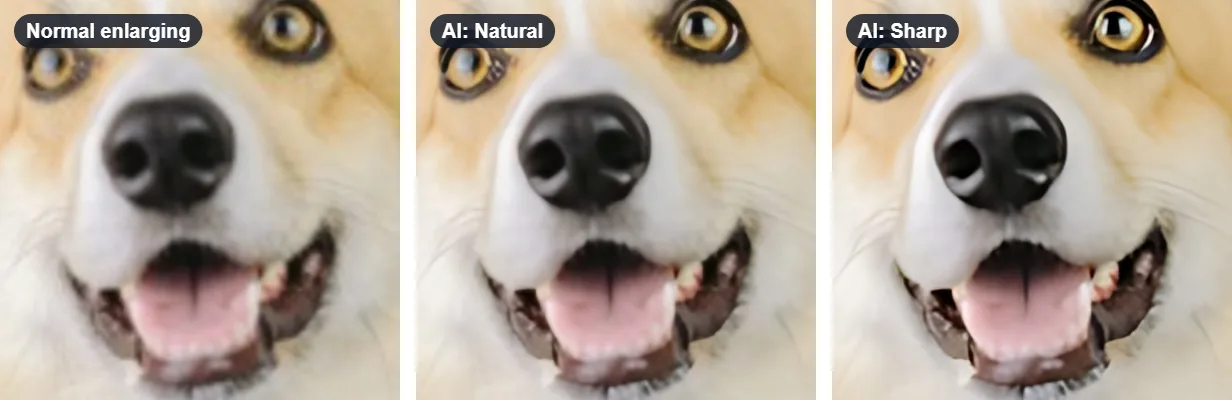
- Natural (the default) mixes the AI result half and half with a smooth enlargement. It's sharper than normal enlarging, while skin and hair still look real. Use it for photos and faces.
- Sharp is the AI result on its own: crisp edges and text. Use it for logos and graphics. On a 120-pixel-wide logo, 4× Sharp gave crisp letters where normal enlarging was blurry.
Not sure? Try both, and drag the compare slider to see the original and the result side by side.
To show the difference, we made a photo of a dog small on purpose (300 × 449 pixels) and enlarged it 4× to 1200 × 1796 pixels, three ways:
How long it takes
Small images take a few seconds. In our tests on an ordinary laptop, a 1-megapixel photo took about 15 seconds at 2× using the graphics card, and about 45 seconds when only the processor could be used. A dedicated graphics card is faster. You see the progress while it works.
When normal resizing is enough
You don't always need AI:
- Making an image smaller never needs AI. Use the image resizer.
- A small increase, for example from 900 to 1000 pixels to pass an upload check, looks fine with normal resizing.
- The picture will be shown small anyway, such as a thumbnail or a profile picture: extra pixels won't be seen.
AI enlarging pays off when you need at least twice the size and the picture will be seen up close.
Common problems
The file is much bigger now. Four or sixteen times the pixels means a bigger file. Make it smaller with the image compressor, or save as JPG or WebP. More in how to make an image file smaller.
Faces look a bit artificial. Use Natural rather than Sharp, and start from the best original you have.
It says the image is too large. Choose 2× instead of 4×, or make the image smaller first in the resizer.
The first image takes longer. The model is downloaded and prepared the first time. Later images and visits start faster.
Summary
- Choose 2× for most photos, 4× for very small images.
- Natural for photos and faces, Sharp for logos and graphics.
- AI makes edges and textures cleaner, but can't add detail that was never there.
- For small increases, or images that will be shown small, normal resizing is enough.