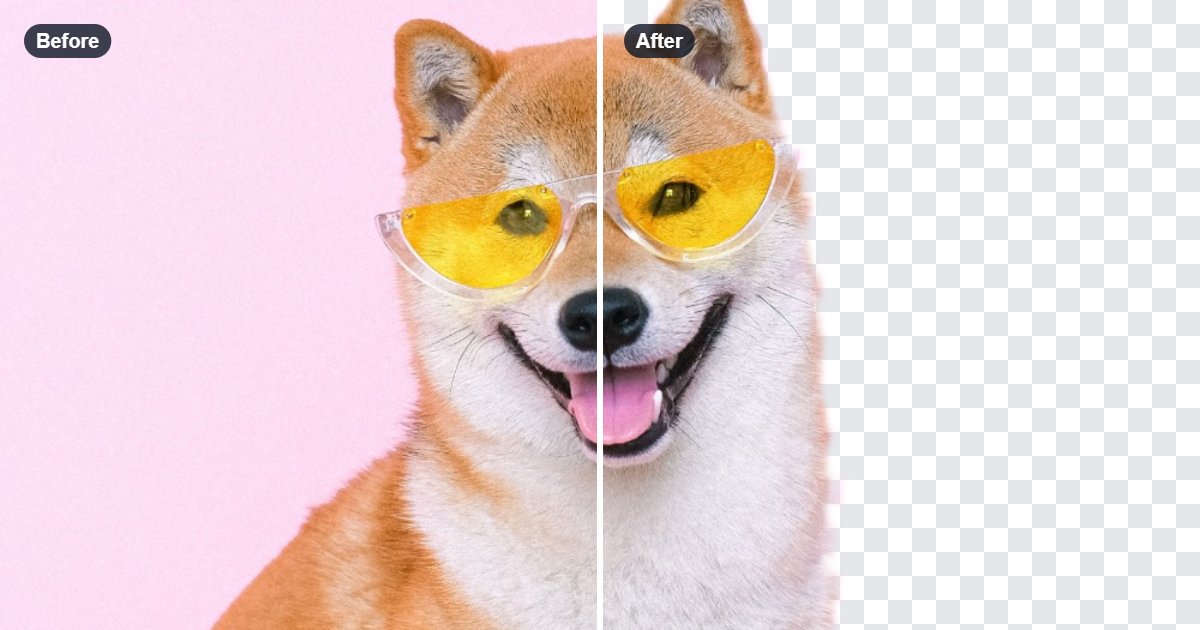
Most online background removers send your photo to their server, process it there and send it back. That's fine for a picture of a mug. It's less fine for a photo of your child, an ID photo or an unreleased product.
The background remover on this site works differently: the AI model is downloaded to your browser and runs on your own device. Your photo is never uploaded. It's free, with no sign-up, no watermark and no daily limit.
The 30-second answer
- Open the background remover and add your photo (JPG, PNG, WebP or GIF, up to 20 at once).
- Under Background, choose Transparent, White or Colour.
- Click Remove background.
- Check the result and download it.
If some background is left, or part of the subject went missing, read on: both are easy to fix.
Transparent, white or a colour?
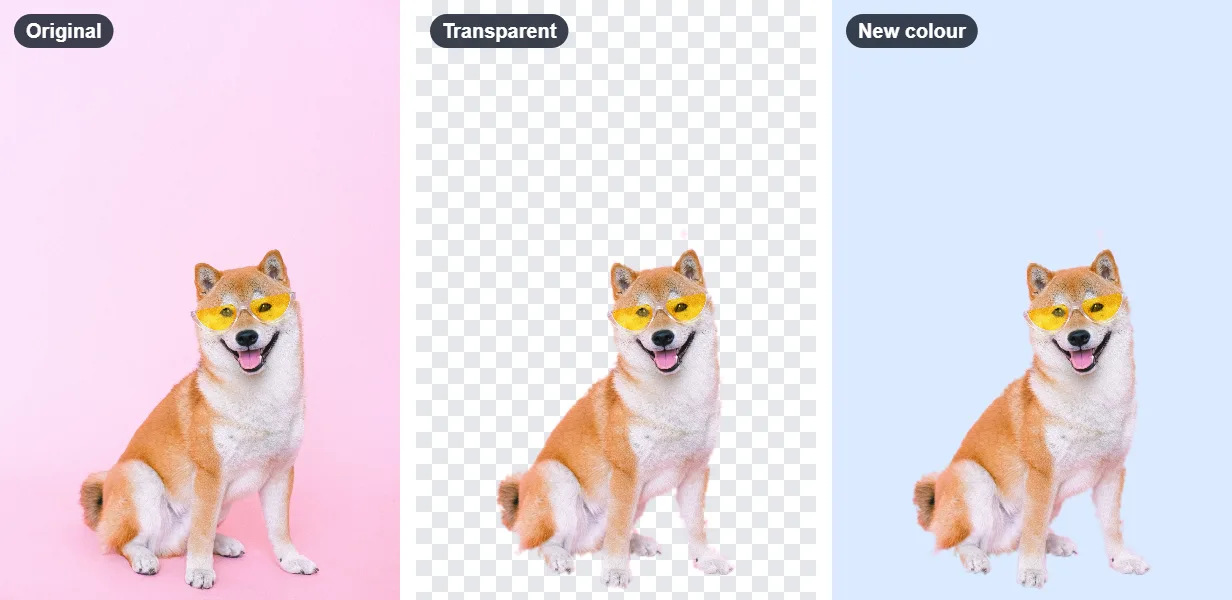
- Transparent: the background is gone completely, so you can place the cut-out on anything: a slide, a poster, a website. Save as PNG or WebP, the two formats that keep transparency.
- White: a plain white background, the usual choice for product photos in online shops. Save as JPG for the smallest file.
- Colour: any background colour you pick, for example your brand colour or a soft grey.
JPG can't be transparent. If you choose JPG with a transparent background, the empty areas are filled with white unless you choose another colour.
The first photo takes longer
The first time, your browser downloads the AI model (about 44 MB) and gets it ready. Your browser then keeps it, so the next photos and later visits start much faster.
In our tests on an ordinary laptop, a portrait of about 1 megapixel took around 7 to 10 seconds once the model was ready. Bigger photos take longer; you see the progress while it works.
Background left around the subject? Use the strength slider
The AI looks for the main subject: a person, a product, an animal. It works best when the subject is clear and in focus. When the background has almost the same colour as the subject, such as a light blue shirt against a light blue wall, small patches can stay next to the edges.
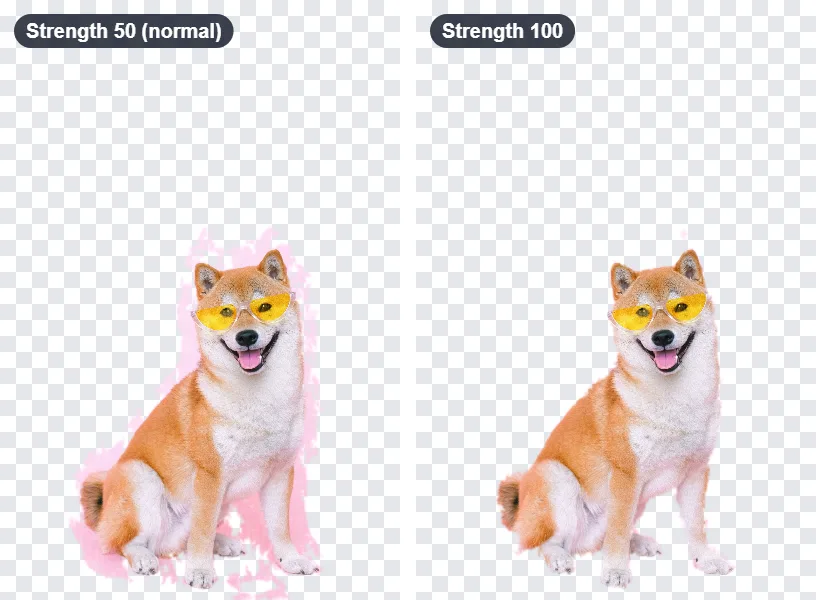
Move Removal strength towards Remove more. The picture updates by itself in about a second, because the AI's work is reused rather than repeated, so you can try a few positions. If edges or hair start to disappear, move it back towards Keep more.
In our example, the pink wall is close to the colour of the dog's fur. At normal strength, pink patches stayed around the dog. Moving the slider all the way to Remove more cleared them, and the fur stayed.
Fix anything else with the touch-up brush
For anything the slider can't fix, click Touch up under the result:
- Erase: paint over leftover background to remove it.
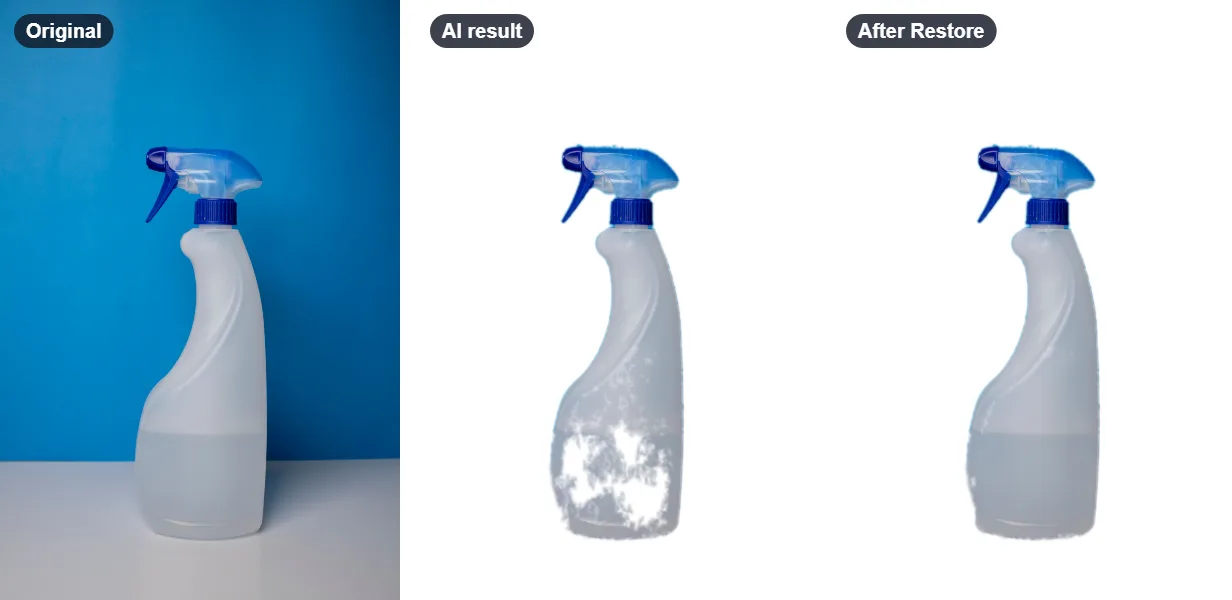
- Restore: paint over a part that was removed by mistake. The original picture comes back exactly where you paint.
- Move: drag around a zoomed-in picture. Zoom in for small details, such as the gap between an arm and the body.
For example, the AI wasn't sure about the clear lower half of this spray bottle and removed part of it. Painting over it with Restore brought it back:
Undo takes back the last stroke. Click Apply touch-ups when you're done. Your touch-ups are kept if you change the background or format afterwards, and Reset touch-ups removes them all.
Make the edges look natural
A cut-out with razor-sharp edges can look like it was cut with scissors. Under Edges:
- Soft (the default) fades the edge over a few pixels, so the subject sits naturally on a new background.
- Very soft fades a little more. It suits hair and fur.
- Crisp keeps hard edges, for logos and graphics.
The fade is scaled to the size of your photo, so it looks the same on a small picture and a large one.
What it's not so good at
Being honest about the limits saves you time:
- Fine hair and fur come out soft and natural, but single loose hairs may be lost. That's hard for every background remover.
- Busy scenes with several people or objects: the AI keeps the main subject, and may treat things in the background as part of it. Erase them with the brush.
- Glass and see-through objects may be kept as solid or partly removed. Touch them up if needed.
- Blurry or very dark photos give less clean edges. Start from the sharpest photo you have.
Common questions
Are my photos really not uploaded? Yes. Your browser downloads the page and the AI files from our site, but your photo itself is never sent anywhere. The photo is processed on your device.
Does it make my photo smaller? No. The result has the same width and height as your photo. To change the size afterwards, use the image resizer.
Which format should I save in? PNG or WebP for a transparent background, JPG for a white or coloured one. More in PNG, JPG or WebP: which format to use.
Can I do several photos at once? Yes, up to 20. Download them one by one or all together as a ZIP.
Summary
- Choose Transparent, White or Colour, and click Remove background.
- Patches left? Move Removal strength towards Remove more.
- Anything else: Touch up with Erase and Restore.
- Soft edges look natural; Crisp suits logos.
- Save as PNG or WebP for transparency, JPG for a white background.