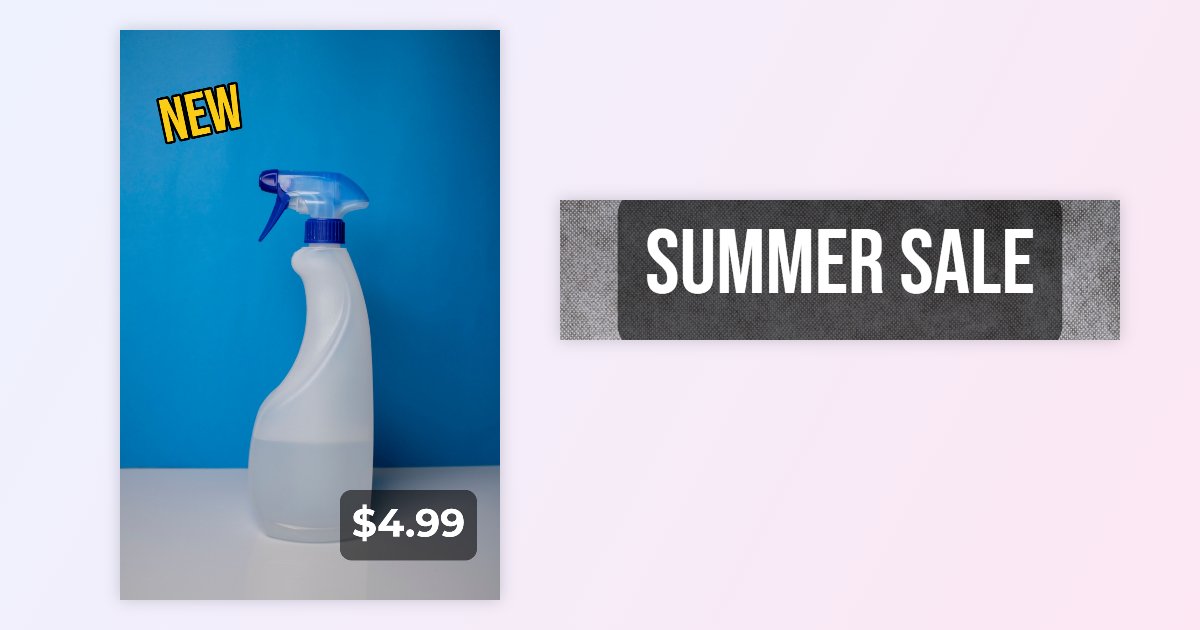
A price in the corner, a "New" or "Sale" label, a short caption: small bits of text that make a product photo work harder in a shop, an ad or a social post. You don't need design software for them.
This guide shows how to add them with the free add text to image tool, which works in your browser: your photo isn't uploaded anywhere. It also shows the one thing that matters most with text on photos: keeping it readable.
The 30-second answer
- Open add text to image and add your photo.
- Type your text in the first text box, then drag it into place on the picture.
- Pick a font, size and colour; turn on Background box or Outline if the text is hard to read.
- Click Add text for each extra label, then Download image.
Step 1: add the photo and the first text
Drop your photo onto the tool, or click Select image. A first text box appears on the picture, ready to edit: white, bold and with a thin black outline, which is readable on most photos.
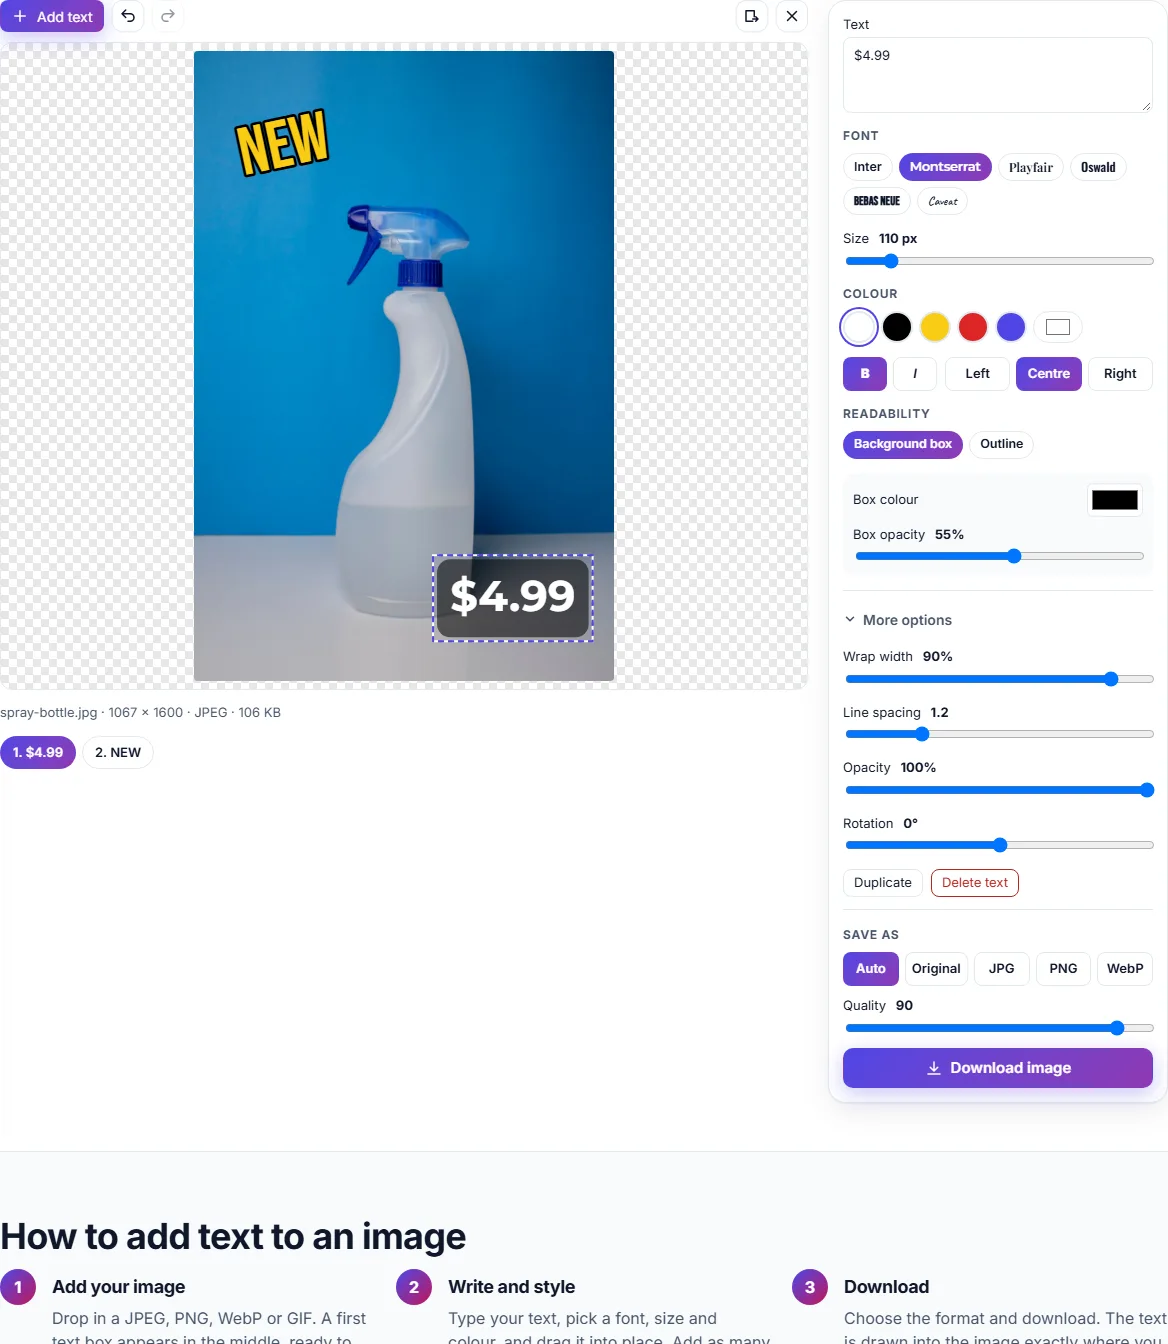
Type your text in the Text box on the right, for example a price, and drag the text on the picture to where you want it. You can also move a selected text with the arrow keys, and Delete removes it.
Step 2: choose a font, size and colour
The tool has six fonts, each shown in its own style: Inter and Montserrat (clean and modern), Playfair Display (elegant), Oswald and Bebas Neue (tall and bold, good for labels), and Caveat (handwritten).
For our example:
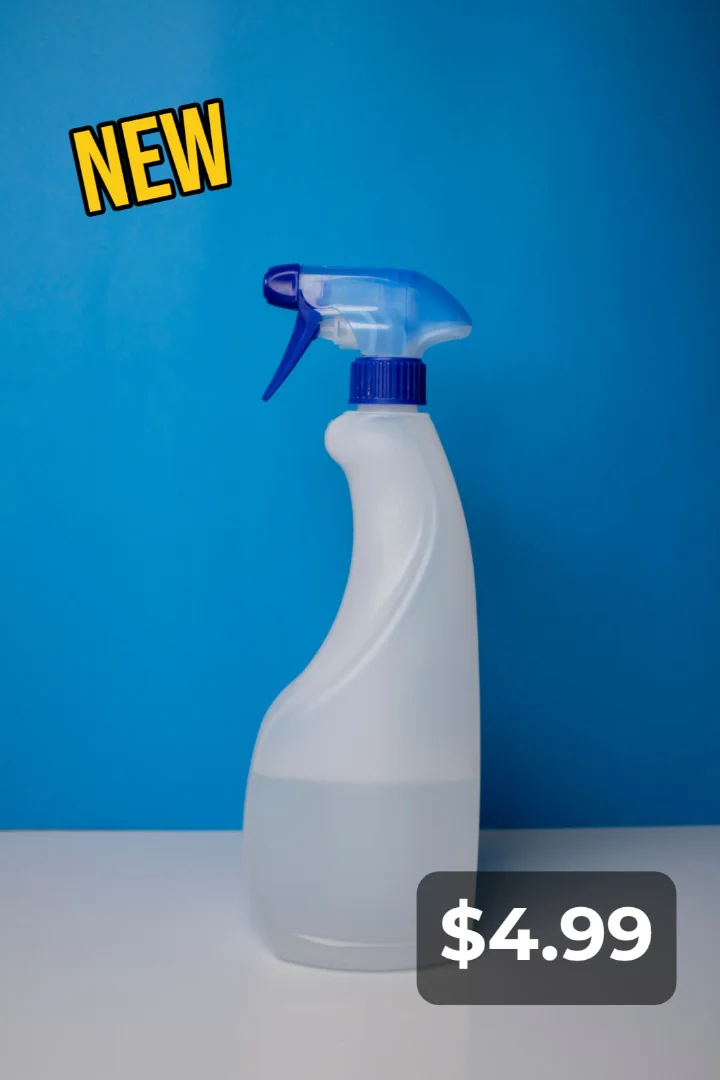
- Price: Montserrat, bold, white, size 110, in a Background box.
- "NEW" label: Bebas Neue, size 170, yellow, with an Outline, tilted by −12° under More options › Rotation.
Choose the colour from the swatches (white, black, yellow, red, indigo) or Any colour for an exact shade. More options also has the wrap width, line spacing and opacity.
Step 3: make it readable
Text on a photo is only useful if people can read it at a glance, including on a small phone screen. On a plain background almost anything works. On a busy one, the text needs help.
Here's the same white headline on a textured background, three ways:
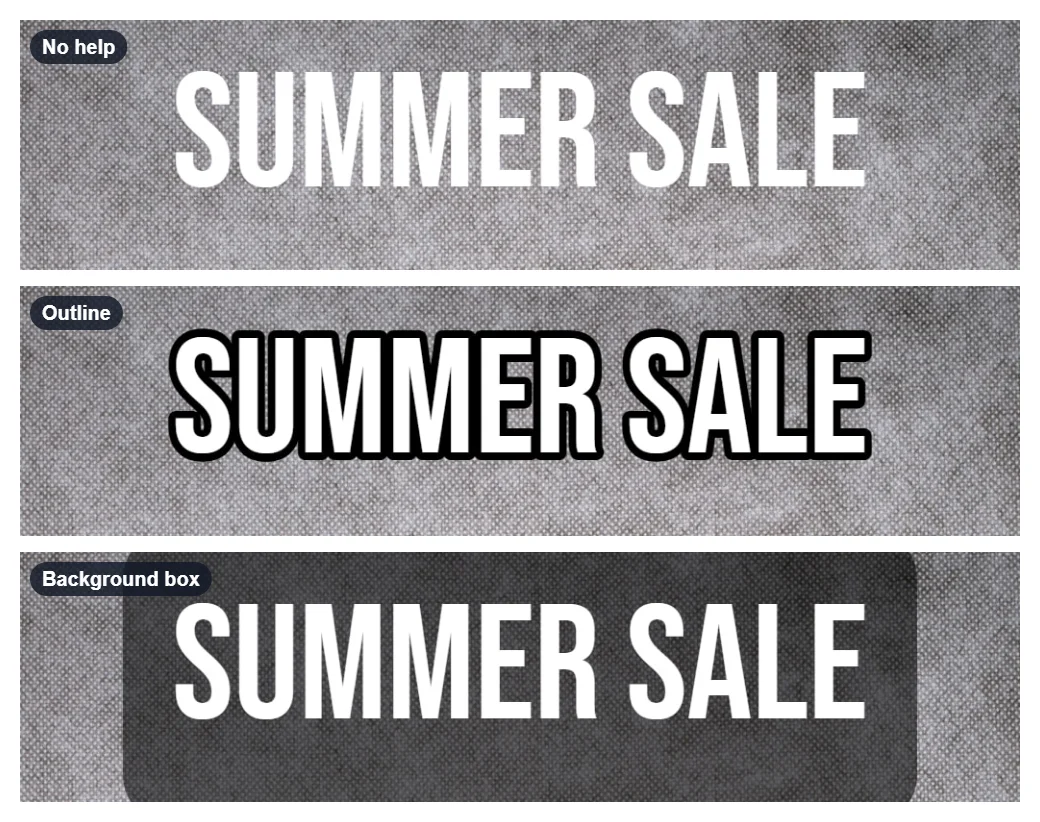
- No help: the white letters fight with the light parts of the texture.
- Outline: a dark edge around each letter separates it from the background. Good for short, bold words like "NEW" or "SALE".
- Background box: a panel behind the text. Clearest of all, and great for prices and captions. Set its colour and see-through level with Box colour and Box opacity.
A few more tips:
- Use few words. "−20%" beats "Now twenty percent off".
- Make it big enough. Text that looks fine on a computer can be tiny on a phone.
- Keep it off the product. Put labels in empty corners so the product stays visible.
- Leave space from the edges. Platforms sometimes crop photos slightly.
Step 4: download in the right format
Under Save as, Auto keeps your photo's format, so a JPG stays a JPG. Choose PNG for graphics or when you need a transparent background, WebP for small files on websites. The text is drawn into the picture exactly where you placed it.
Our photo, 1067 × 1600 px, was saved as spray-bottle-text.jpg. The original isn't changed.
Questions
Can I edit the text after downloading? No. The download is a normal picture with the text drawn in. Keep the page open while you work; undo and redo work while you edit, and you can download again after changes.
Can I add the same label to many photos? Each photo is done one at a time. Once you have a style you like, Duplicate copies a text within the same photo.
Can I put text on pieces of a split image? Yes, in the image splitter: see how to put different text on each piece of a split image.
Is my photo uploaded? No. The text is drawn in your browser, on your device.